Corvette Forum : DigitalCorvettes.com Corvette Forums banner

63-82 Rear Trailing Arm Rebuilding

158K views 240 replies 64 participants last post by  gtr1999 
#1 · (Edited)
:crazy: Ok here is one job I get a lot of questions on. First thing I find is that a lot of guys are intimidated by this job. Once you understand corvette rear bearings the mystery will be gone. You'll be able to decide if you want to buy the tools and try the job or farm it out. Now the tool cost for a set of arms is more then farming them out so think about what your plans are. If you want to join the dozens of Arm Rebuilders out there buy the tools - but do the job right. This post will have pictures of various jobs I did so don't be surprised if the arms look different.

To do this job follow the GM manual procedures. I do some machining to my jobs that others don't. Take it for what it is and make your own choices. One thing I already know is guys have been asking questions now as opposed to just having the jobs done. Also ask your rebuilder if they supply any job reports and pictures on their work. I like to keep the car owners involved and make sure they know what was done with their arms.


Here are what your arms may look like once you get them out. I always rebuild them off the car but they can be done on the car. I would never do it that way unless I was stuck out of state on the road. Doing them on the car will not address the front bushing for dry rot and play. Trying to get an accurate setup will be difficult but getting a "good" job with GM specs up to 008" endplay is possible- if that is what you want ok, I like to dial them in much tighter so there is no lateral play and the bearings are smooth.
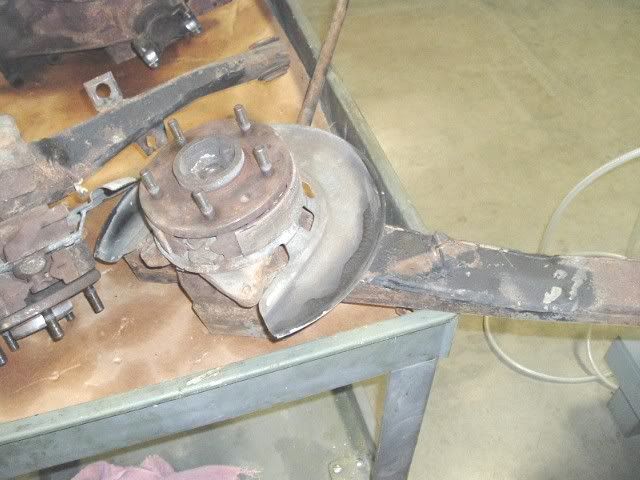


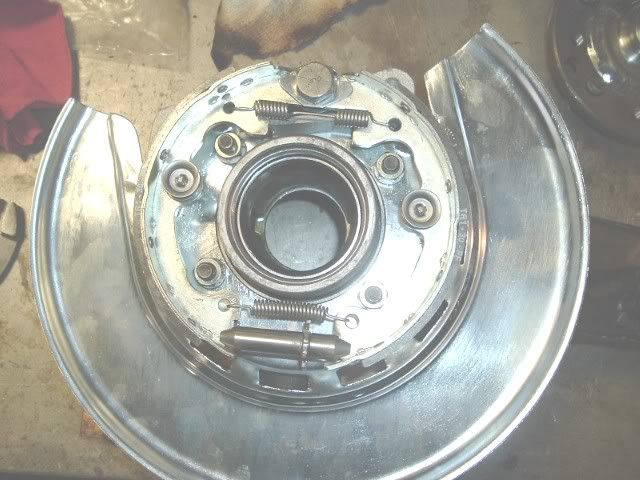
Here is a 64 arm. Remember the 63-64 and some 65's had drum brakes.
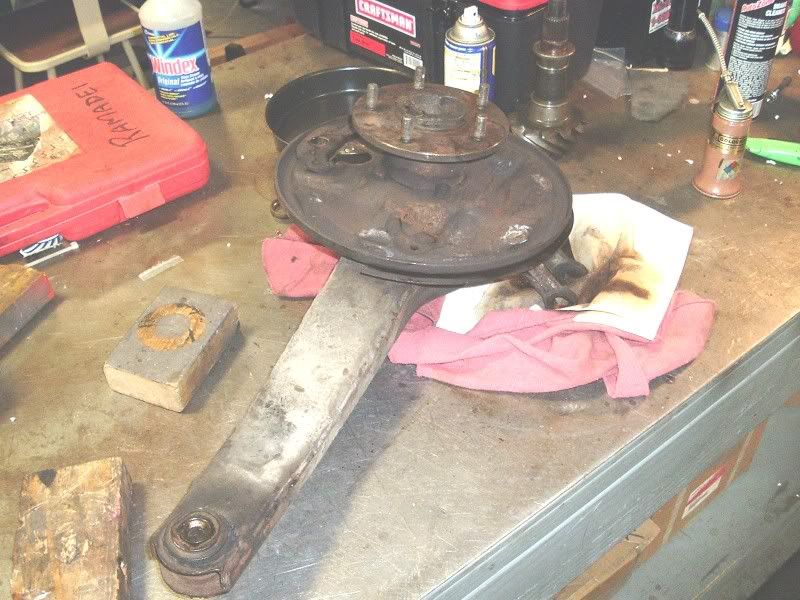


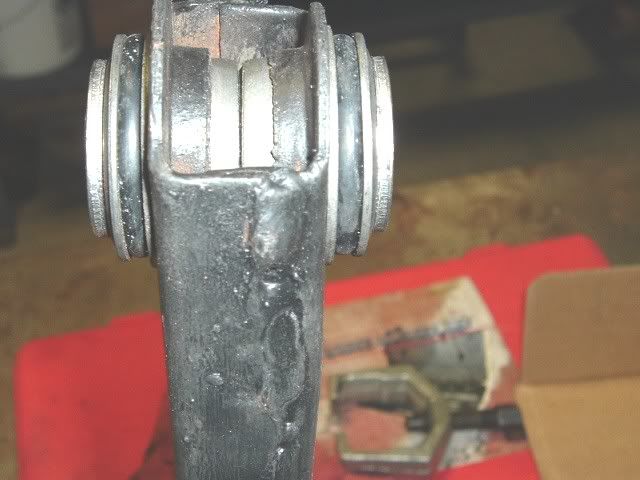
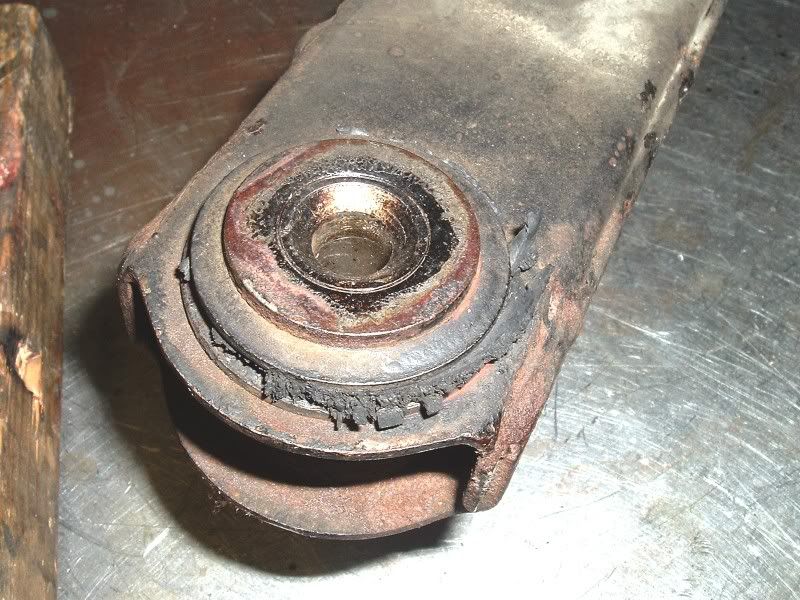
Look them over for rot, being bent, and look at the front bushing for dry rot.


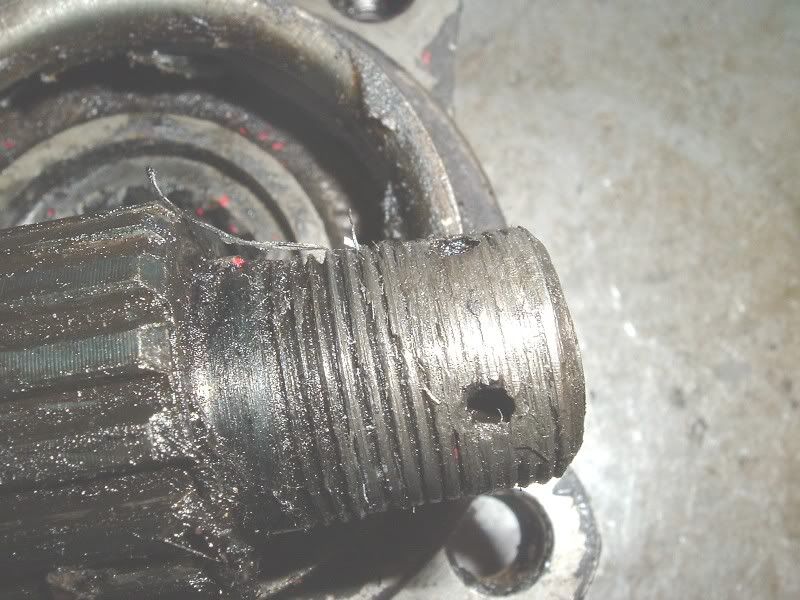
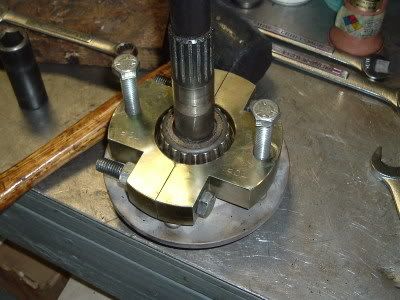
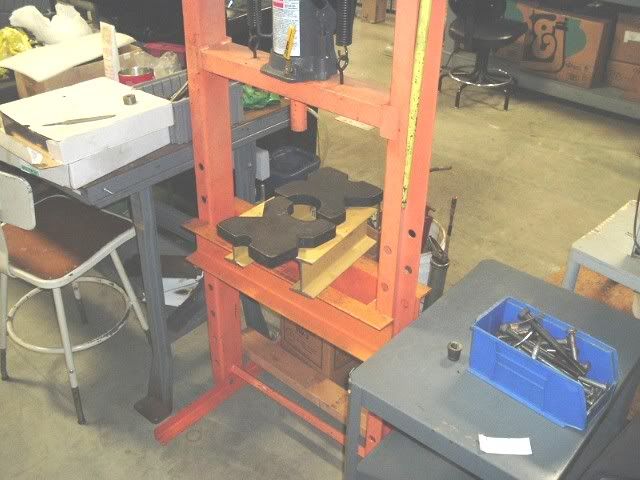
I use one of those spindle protectors and either press or hammer the spindle out. If you hammer them out place something to catch the spindle. Don't worry about the bearings as they will be replaced anyway. If you have one that is really rusted the press and some heat may be the only way to go. Also the spindle nut should come off and the tool thread on without a problem. Many times these have been worked on before and the threads are already shot and a new spindle is needed.

REVISION- I have not used a press on any arms now in over 15 years. A 4-5 lb mini sledge and the spindle knock out tool should be all you need.


Here we have parts to one arm apart and cleaned up for inspection.
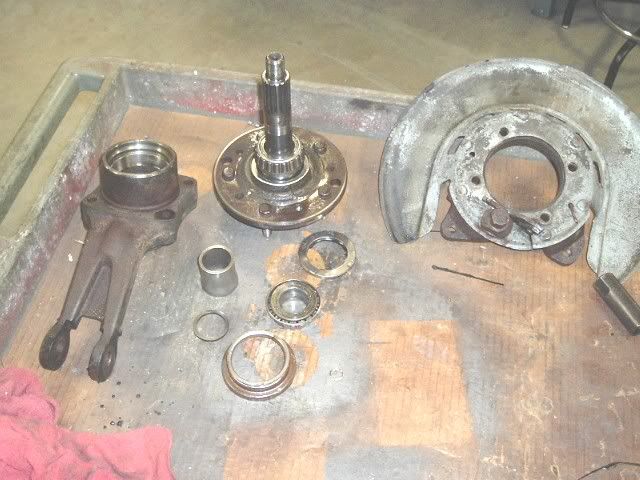


Here I found someone was in here before and installed the outer seal backwards.
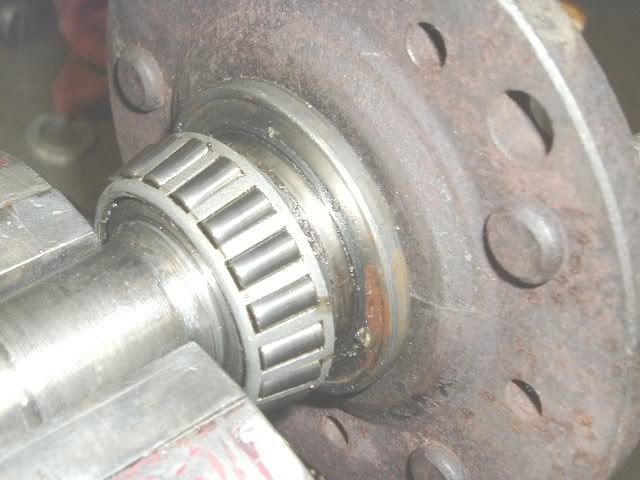


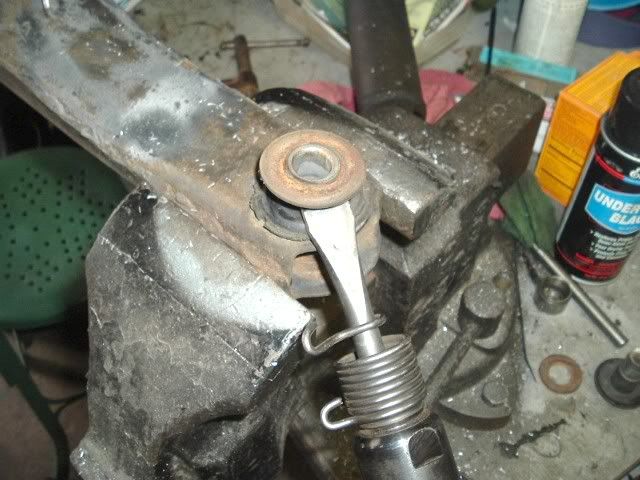
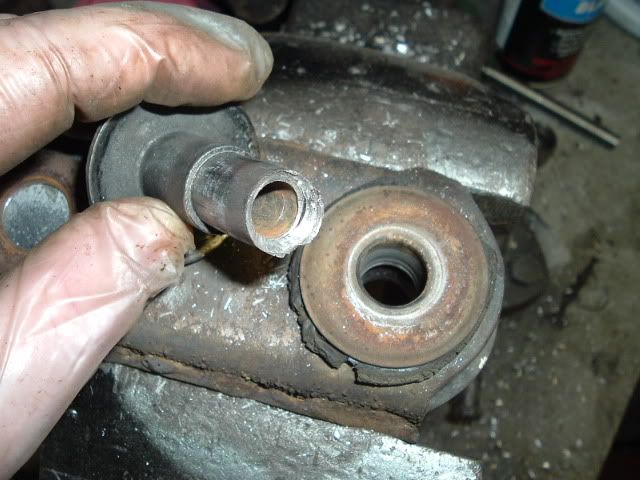
Once stripped down, I remove the front bushing
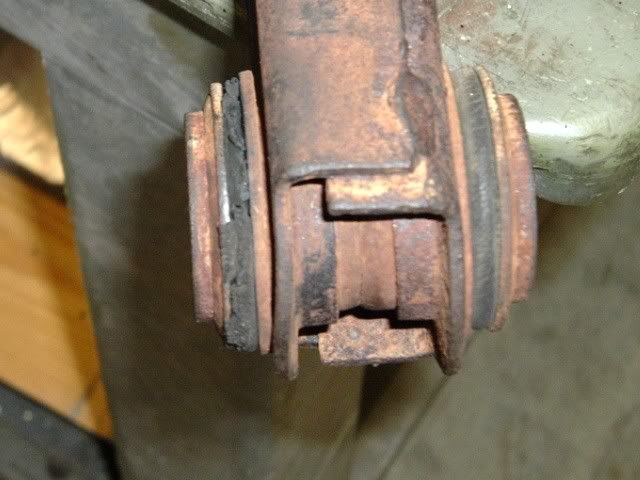

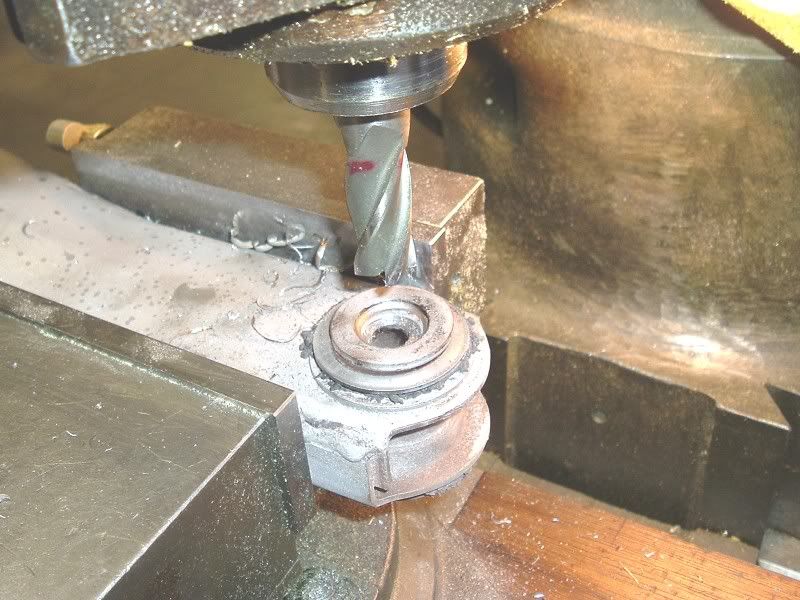
Drill the flare out and use an chisel to remove. I used to put these in a Bridgeport mill but a large step drill works as well.


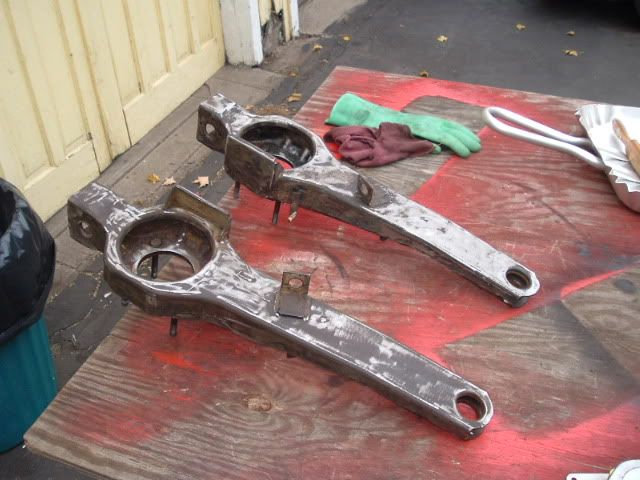
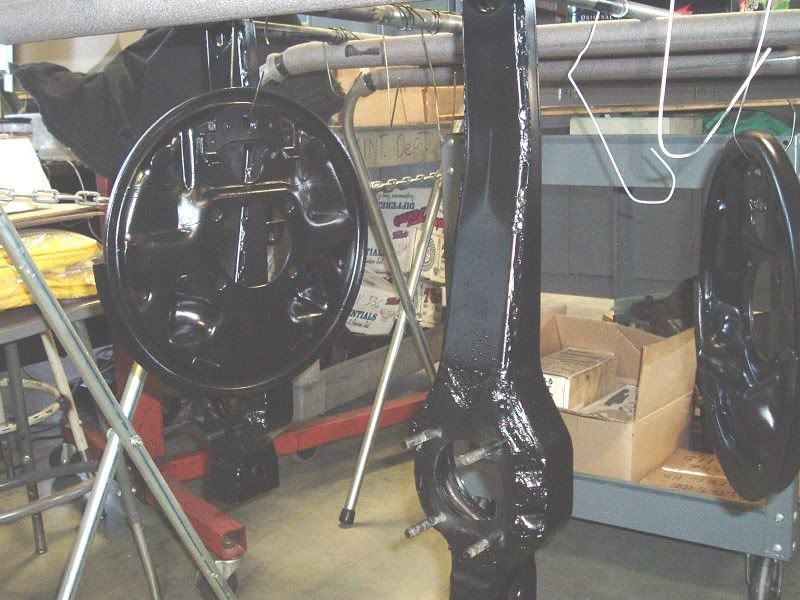
With the arm apart, I blast them to the metal and POR15 prep and paint them. I top coat with a satin black.


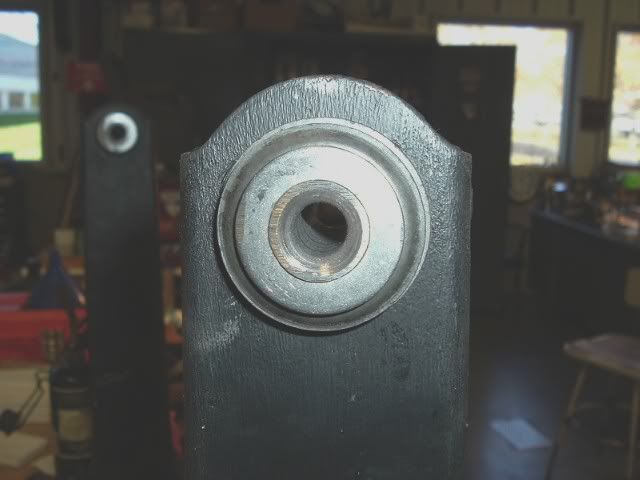
I use only rubber bushings, no poly for me. The rubber have to be compressed and then flared to correctly install them. I have found all kinds of crap work in this area, some have even left them unflared!
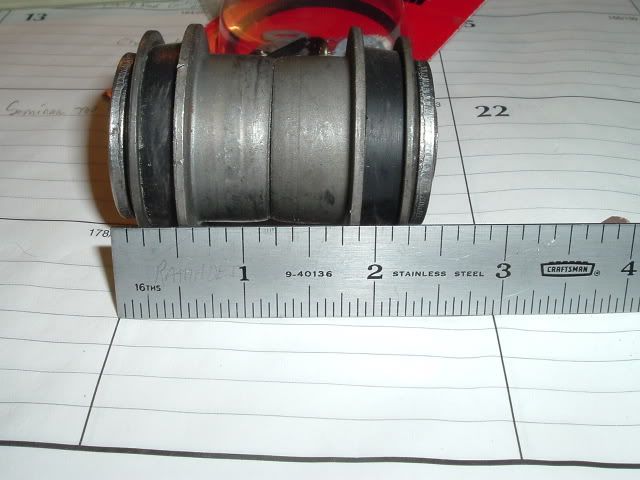

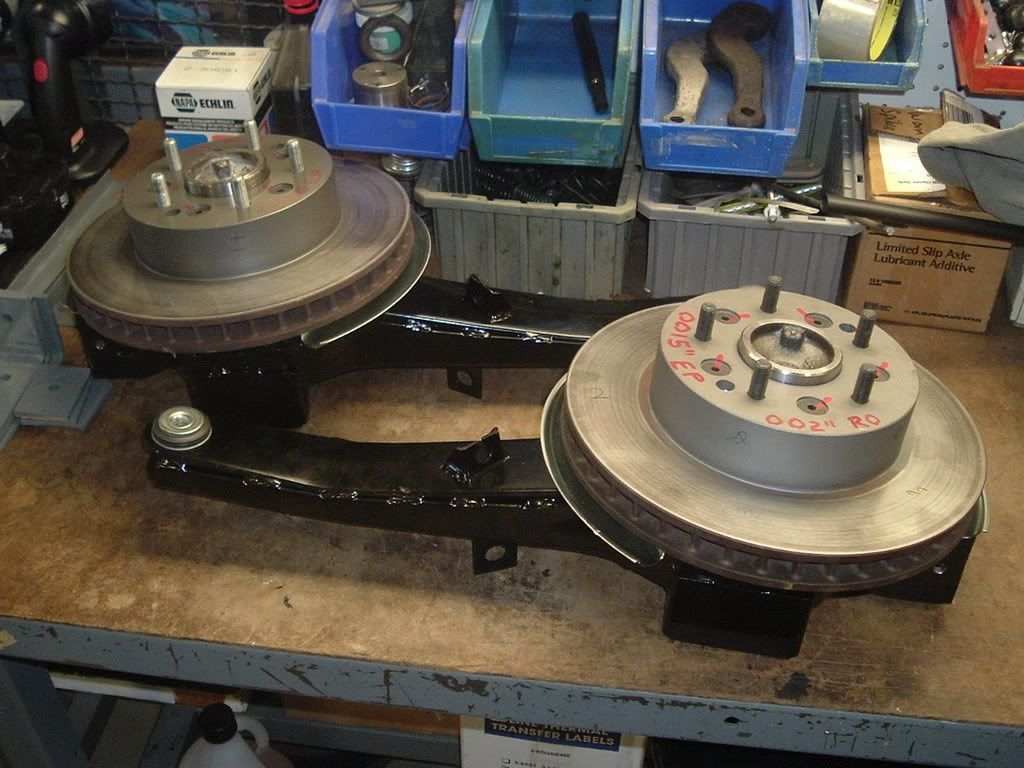
Here is the tool I made. Works good. There are a few on the market, some good -some junk.
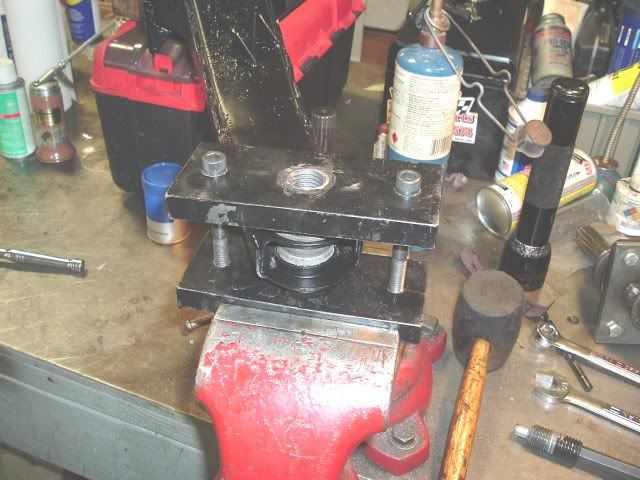


Here are what mine look like


See less See more
16
#2 · (Edited)
63-82 Rear Trailing Arm Rebuilding Part 2

Next look at your spindles. If you have threads like this replace the spindle. The spindles are axles so don't get confused by people's terminology. When you get the axle out look to see if the outer bearing is still pressed on. If so that's very good but if it moved or came off the axle is most likely undersize OR someone slip fit them- mistake GM did that in early 63 and the bearings spun, got very hot and snapped the axles. Those were drum brake cars and the wheel would just come off. Look to make sure the splines are not twisted, the good GM axles usually last with 400-450hp but enough abuse will break them.DO NOT go cheap and buy imports arms or axles, they are junk.


Ok on to Bearings. I use only Timkens and CR/SKF seals. I could debate the fact other bearings are just as good or Timken are not made here anymore. You decide what you want. You can save $20 using imported bearings if you want. The Timkens I have are still stamped USA and I'll pay more for them.


The book calls for .001-.008 endplay in the bearings. I set them to .0015 -.002 +/- .0003" That is correct 3 tenths. Others may tell you otherwise which is ok for them, remember this is how I do them.


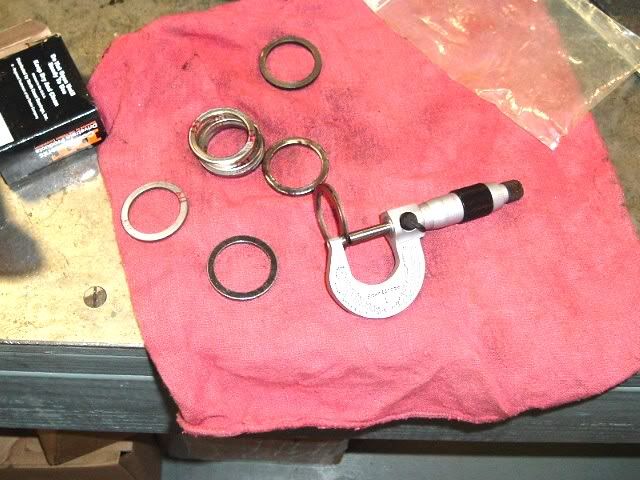
Here is the fixture I made to setup the endplay


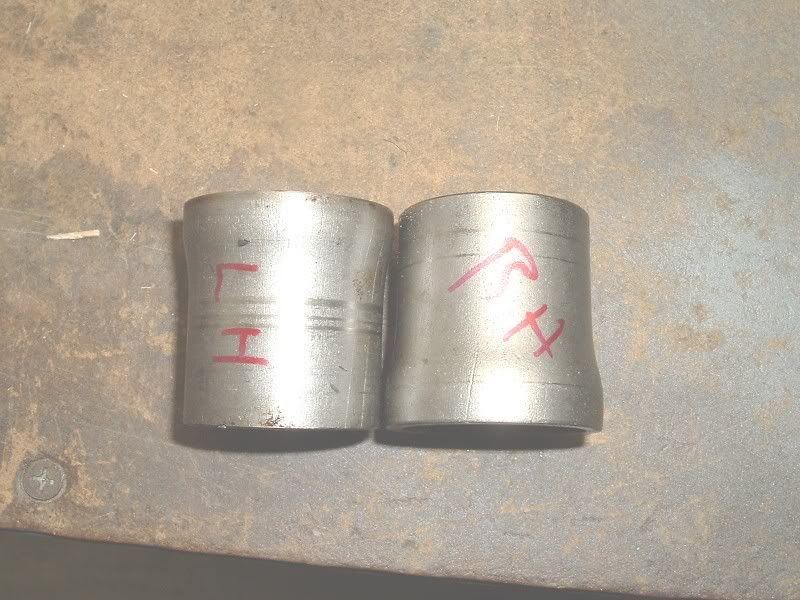
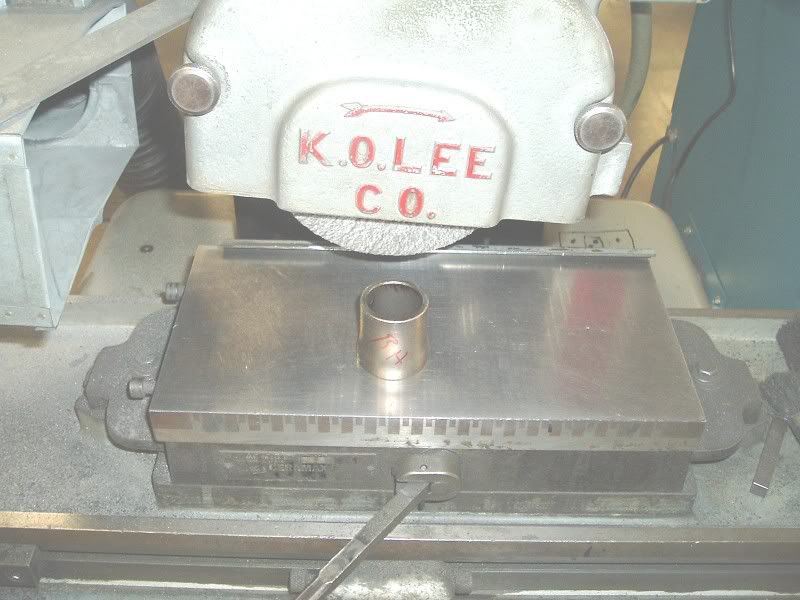
Now here is the deal on this job. IF you want the BEST job done use a surface grinder to dial in the endplay. If a guy tells you he can dial in .002 endplay with just the common shim kits - walk away. I have never had one shim I could use without grinding it to size. Also, you see those kits with the new spacers in them, total waste of your money. Unless the original spacer was burnt by an idiot with a torch they are still good and they do not fail in service. The thing with them is they are not parallel finished. I always parallel grind them before even setting them up in the fixture. It is not uncommon to find them out .005 or more. This can change the endplay you setup on the setup tool to the final press on install. The amount of damage on the spacer faces will determine just how much I have to clean up before I can reuse them. Sometimes the large diameter is beat up pretty bad and once cleaned up the spacer is no good because the inside angle where it is tapered will hit the shoulder on the setup tool or spindle. This is important, if you miss it you will never dial in the endplay and the reading you get will be false. Once on the spindle or setup tool there should be no gap under the spacer, if you can slip a 001 shim in there then it's all done and you will need a new one with the full counter bore end.


OK with the spacers ground and in the fixture. I use a large shim to start. I have one that I use as a setup shim. I torque the tool to 100 ft/lbs and see how much endplay I have. Then grind a new shim to size and double check it. I only use light spindle oil on the bearings- no grease until you are done and ready to install the bearing in the press.

Use a micrometer over a dial caliper for this job. If your guy thinks a mic is a C clamp - walk away. Or even better as reported in a leading corvette magazine- "so and so has been rebuilding rear bearings for so long, he can feel the correct endplay"


When the endplay is set I install the prepped and painted parts on the arm.
It is much easier to install the parking shoes with the spindle out of the way.


Now before you install the spindle you have to remove the outer bearing. This should be done before you get to this point. Remove the bearing, clean the spindle, check the journals, replace the studs and I face the flange in a lathe as well.


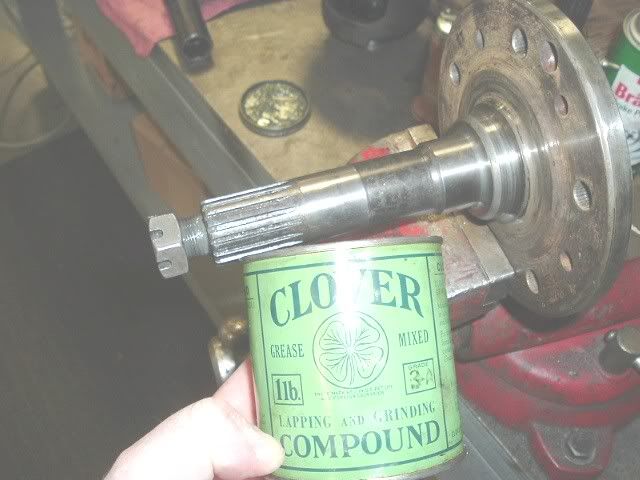
Now if the threads are rolled a little you may be able to save them. I have a thread forming tool, thread file, lathe, but you can use the "old school way" of using an old nut and some very fine lapping compound to clean them up. BE sure the threads are good and you use a new nut before you get to the bearings.

 
#3 ·
63-82 Rear Trailing Arm Rebuilding Part 3

OK now we are up to assembling everything right?

The spindles are cleaned up, the arms painted, bushings installed,and bearing endplay set. One of the spindle preps I do is to remove the rivets and tap the hole 3/8-24. We'll explore this more when I get to the rotors.

Ok, so grease the outer bearing, I use Mobil 1. Install it in the housing, install the outer seal- I use Ultra Black on the OD and grease the rubber seal ID.
Place the spindle in there - it will be loose. Place the spindle on a support and install in the press and press on the outer bearing. Pack the inner housing with grease but leave room for expansion. Install the spacer and shim- you did have them parallel ground didn't you!:smack

Grease the inner bearing and put it on the spindle. Transfer to the press again and press the inner bearing on the spindle. Bring it back to the bench and install the inner seal- again RTV on the OD. I then usually re-use the shield and loctite it in place. With the yokes, I again grind them, clean them up and chase the threaded holes.


Torque the new nut to 100 ft/lbs and check the hole for the cotter pin. If needed you can tighten some more and install the new pin. If the hole is out a lot I grind the nut face to index it on the spindle. The spindle should spin snug but not tight. If you need two hand to rotate it there is something wrong. At .002 endplay you can feel movement,not much but you can feel it.
If something is wrong at this point you have to start over. Now here again is where the job differs as I have seen spindles so tight they could not be moved and so loose the endplay was over .004" Where did I see these works of art? - on tables at Carlisle for sale.


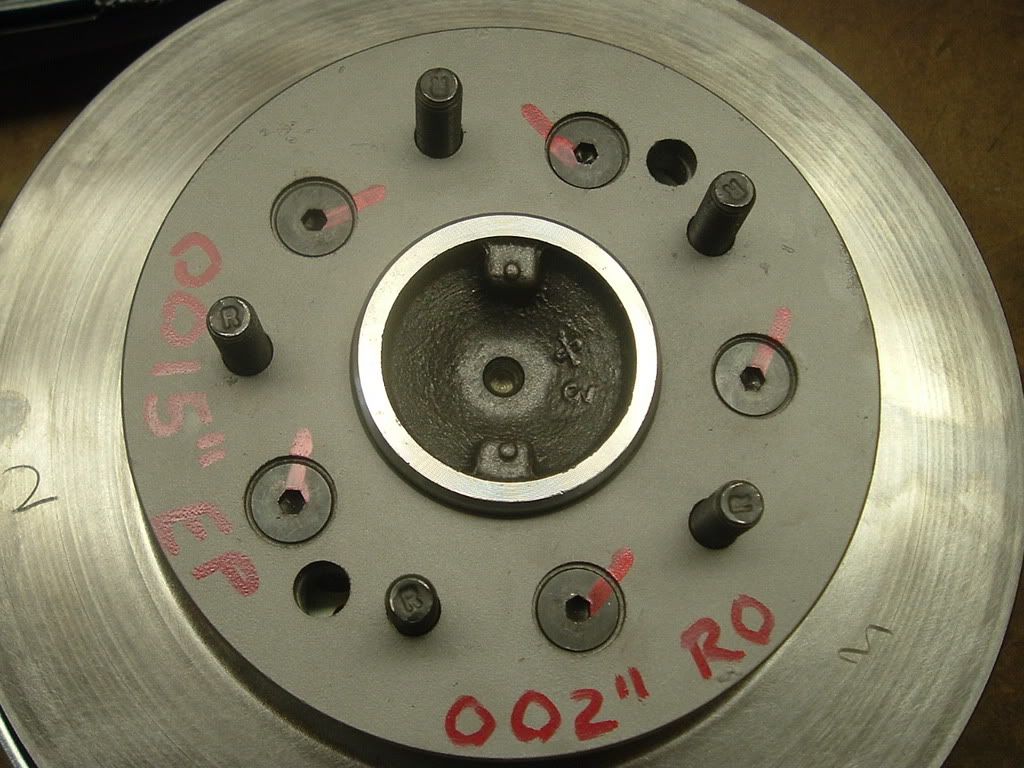
Now I countersink the rotors and bolt them on to the spindle flanges with 3/8-24 flat heads. Then setup an indictor and check the rotor runout. It doesn't matter if you have original rotors, new USA or new imported they will have runout. If over .002 I shim them to .000-.002" You can go to .003 ok. I wouldn't use anything over .003 and you should not accept anything other then that.

I do not like the procedure of using just the lug nuts to hold the rotors on. The runout can change everytime the wheel is removed that way. Many do it this way, I don't. I want the runout to stay where I dial it into.


OK so what do you think and did I answer your questions? Does the job still seem tough once you have the tools and procedures? Doing it my way will take longer but do you want this job rushed? Be honest with yourself and think it through before starting.
 
#5 ·
hey Gary, thanks again for the kickass posts. I merged and stickied 'em for you.

This is quite a task to undertake, but with the right tools and great advice/pictures like this it makes it much easier! I did everything I could by my self, but left the rear spindles to a shop. Probably wasn't the best work ever, but maybe the next time I do the job I'll have the right tools.

As always, nice work :thumbsup:
 
#6 · (Edited by Moderator)
Thanks Jason. It took me some time to get this info together tonight and I went back to check for spelling errors.

The only torque spec's for this job is the 100 ft/lbs. The spec for the lug nuts and front bolt are in the AIM. I don't konw them off hand. I never torque lugnuts - always use a large cross wrench to tighten them. Front bolt should have car weight on it when torquing.
 
#10 ·
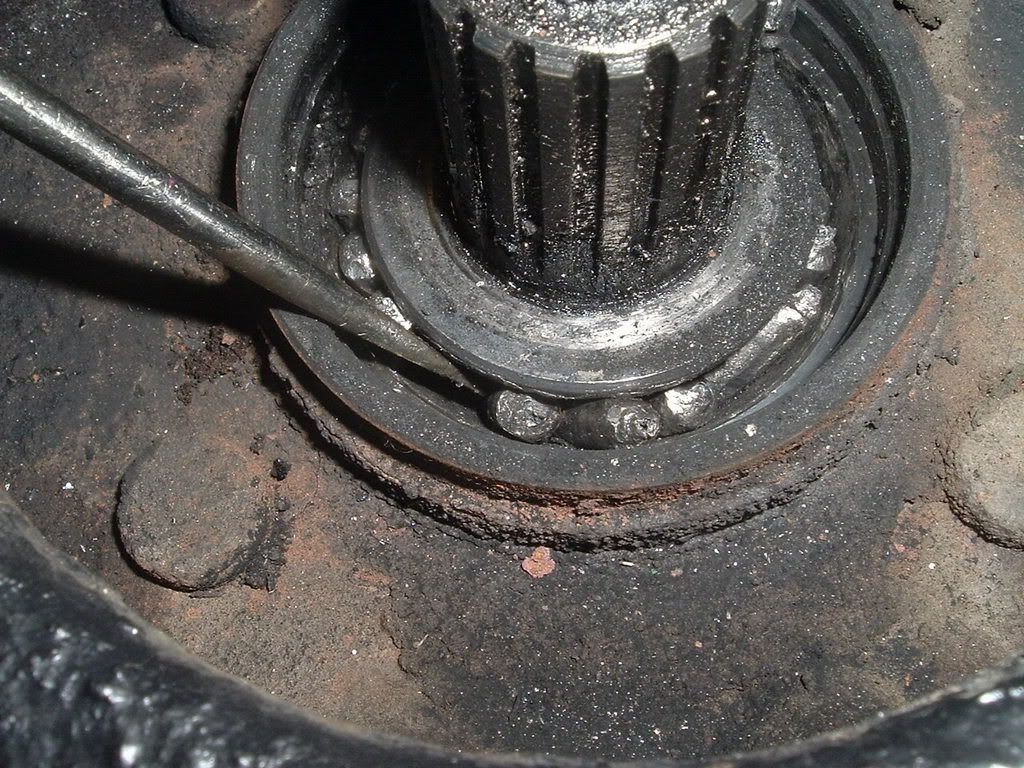
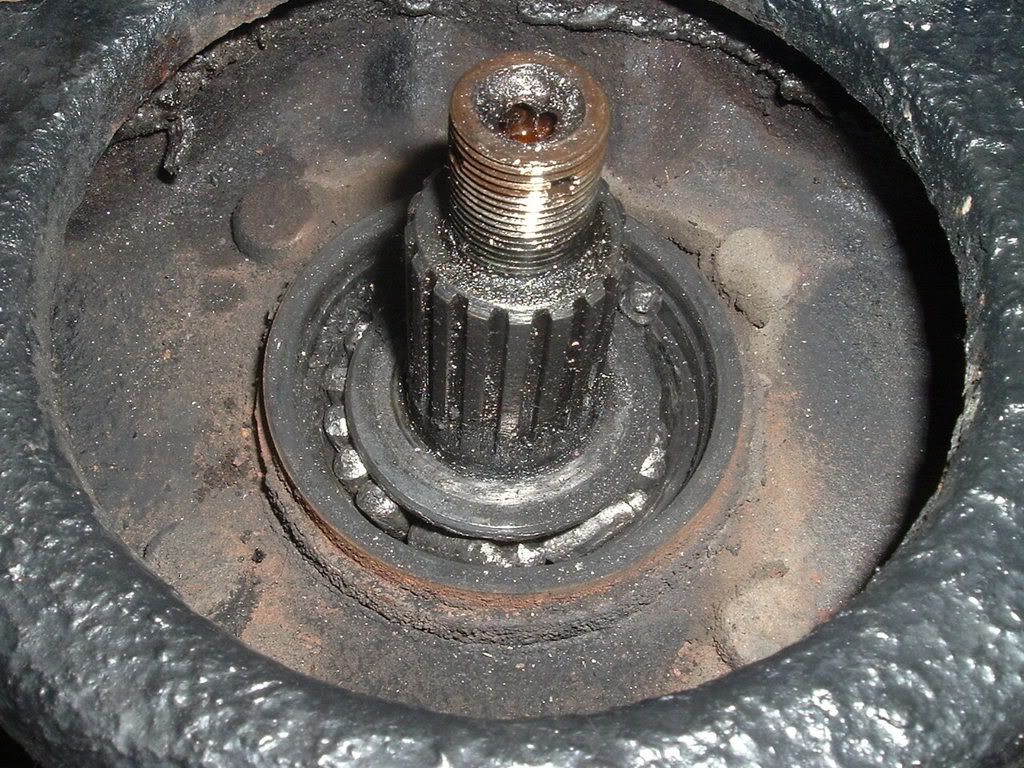
I'm doing a 65 now and one arm has locked up spindle bearing. Thought you might want to take a look. The smell was something awful too. The spindle is wrecked but the support may still be good. I'll clean it up and mic the ID to see if the race spun and bored it open.

Here is the inner bearing with the flange off. Looks pretty good huh:laughing:


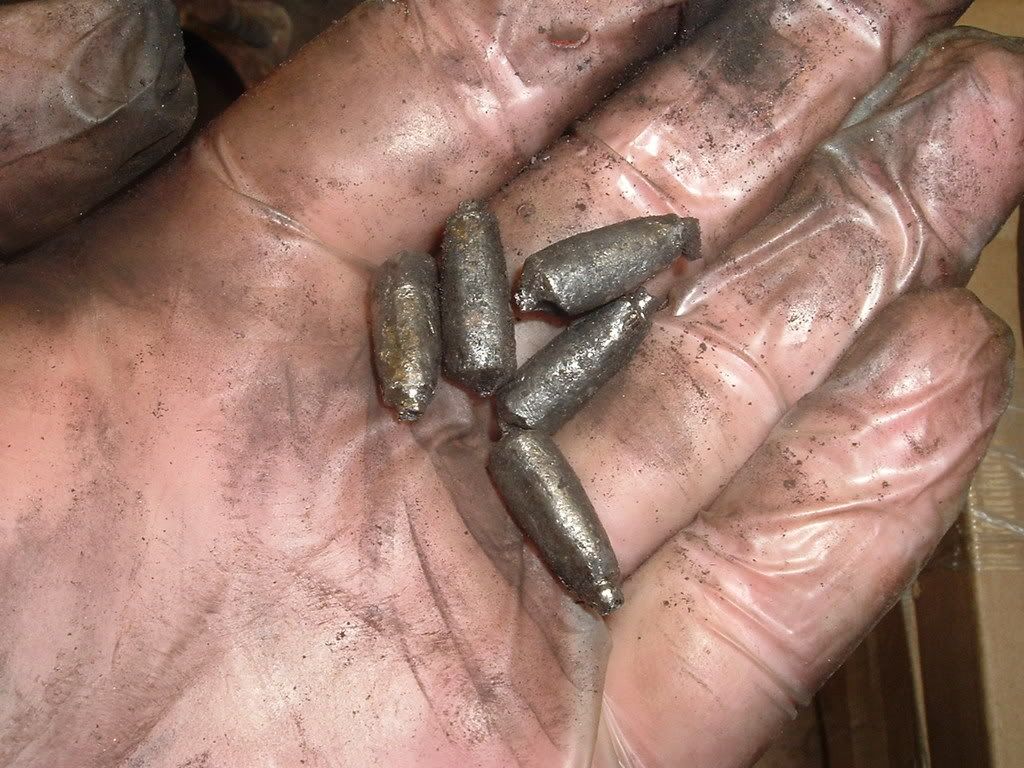
Here are what's left of the rollers. These were the original Hyatt bearings.


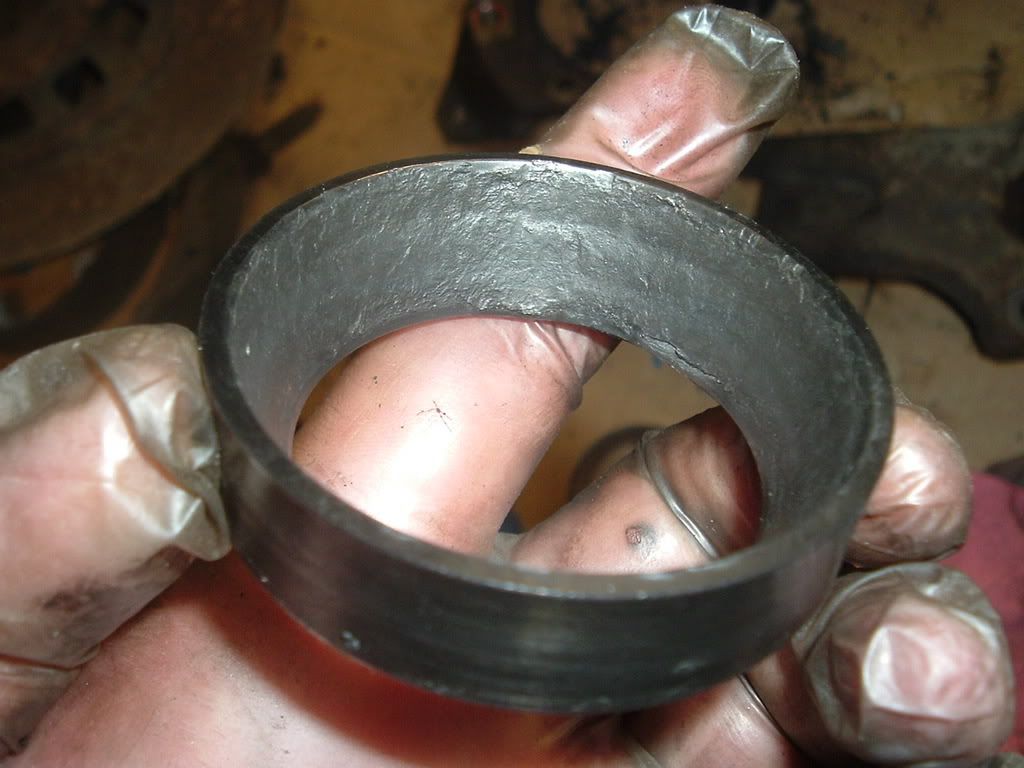
Here is the race. Look and you'll see it's coated with welded on roller metal.


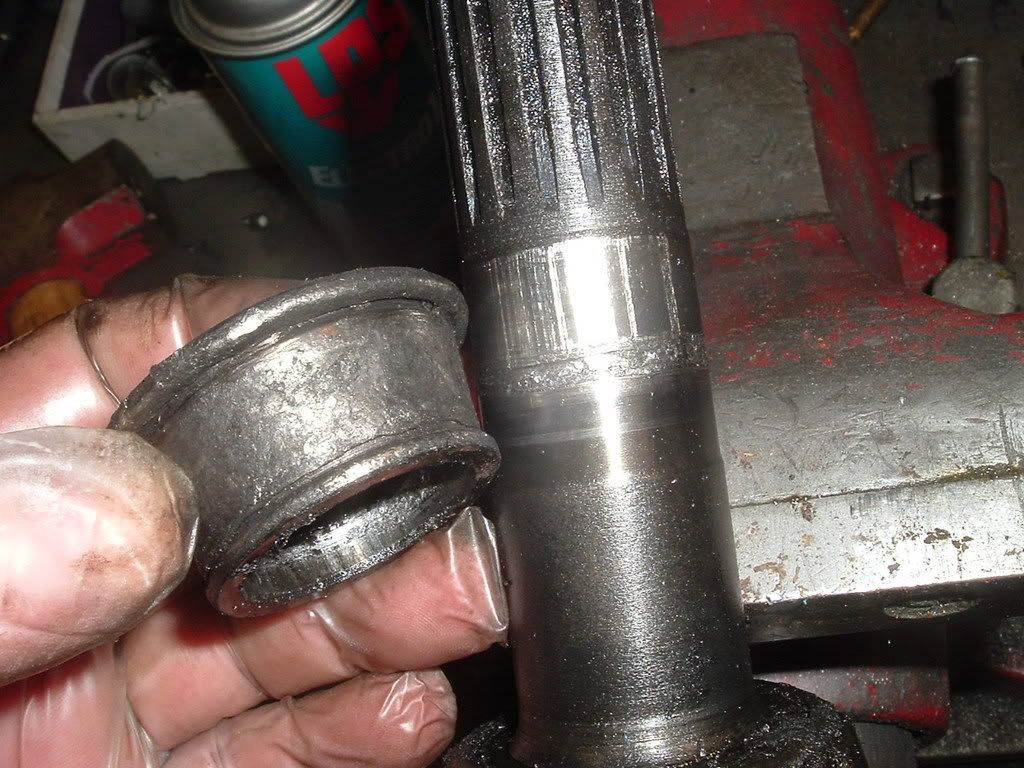
Here is what is left of the bearing, the inner race.


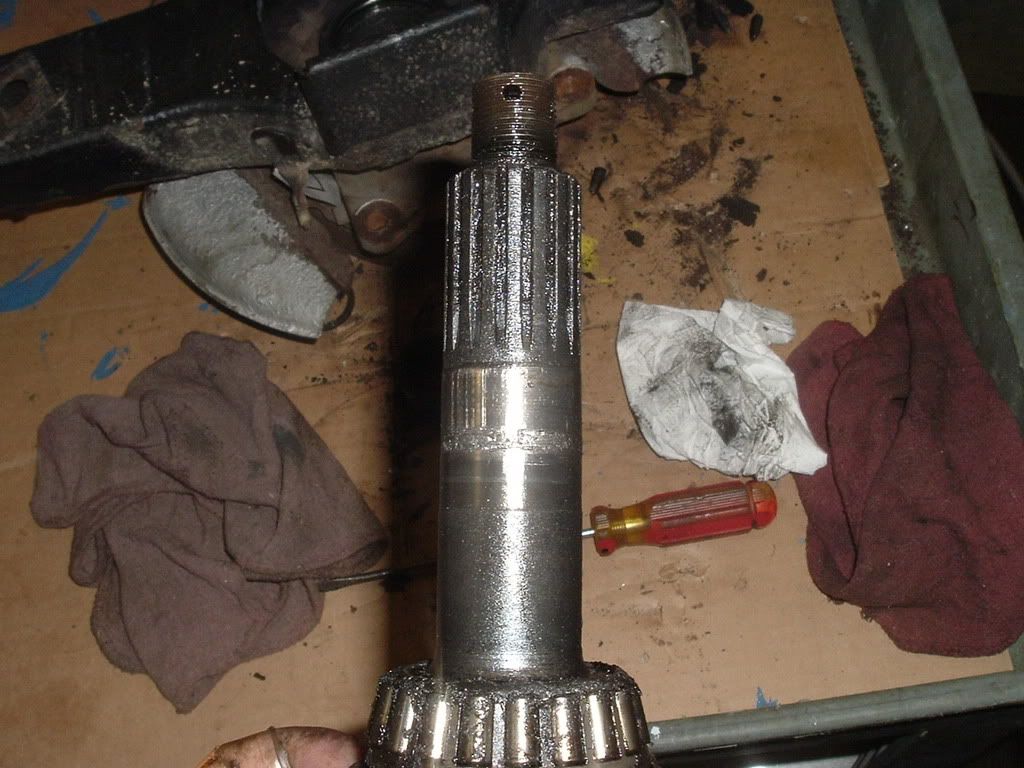
Spindle is done.
 
#11 ·
Gary, That guy got his money's worth out of that bearing:laughing: I saw your comment above about poly bushings in trailing arm pivots. I have offsets that only come with poly bushings. Do you know if rubber bushings could be used instead?
 
#13 ·
I'm sure a lot of guys are using the poly in the arms and have not had a problem. I personally don't like them. With that said, you'd have to see if the bushing is the same. If the arms were built to stock dimensions, outside of the offset, then the rubber bushings should fit.
 
#14 ·
Not too sure. The owner is a member of the forums maybe he'll chime in on it. I just wanted to show the way the bearings will go once the lube is gone and the rollers worn. These were the original 65 Hyatt bearings so 42 years isn't too bad, probably more life then I have left:laughing:
 
#16 ·
Great Post...Thats the most decent write up Ive ever seen about it. I bet You could get it published in the Hot rod chevy Magazines, that cover the old vettes.

Its one of the only areas I couldnt do when I started getting my 69 up to snuff with new engine and drive train. Not enough tools or Experience, so I took the car into a good shop and they did the whole thing for $500. Yikes, but that was 5yrs ,100k mi. and all's still well.
 
#19 ·
Spindle Support....is This Any Good Or Is It A Boat Anchor???

Gary,

You are thorough, precise and detailed in your approach to this work!!

I've not forgotten your offer to do my arms. You know I'm just a little "distracted" right now.

Can you determine from these photos whether this part is worth saving or should I just put it out to the street for scrap?


Thanks Gary!

Regards,

Jim
 
#20 ·
Hi Jim,

I fully understand your current concerns outside of vettes. You are still in my thoughts.

I can't see if there is a problem with those supports. Usually they are ok unless damaged by someone with a hammer taking them apart. The one that I have now with those siezed bearings is still good. The bore does have some scoring but a new race still fit tight and I'll use loctite on the race OD as well.

Gary
 
#21 ·
Hi Gary,

great write-up with good pics !!!

One thing I found difficult and confusing when I
took this job on myself was installation of the outer
seal. Maybe I was just making it more difficult, but:

IO recall that I had to loosly place the outer seal over the spindle
before pressing on the outer bearing. Then, after placing in the
housing and pressing the inner bearing onto the spindle, the seal
needs to be worked into the housing. I recall doing this with some
large screwdrivers ... slowly working around the seal to seat it.

Is there a better/easier way ? Special tool you made to install outer seal ?

also,
Where did you get that kick-ass bearing separater ? Homemade ??


Oh ... reminder for anyone trying this to make sure the shields are
one correctly before pressing on the inner bearing .... had to take
mine apart and together twice (one side).


-Dave :buhbye:
 
#22 ·
Hi Dave,
Actually this post is part of the sticky post above- rear suspension/diff, I just add to them as new things come along I can take pictures of.

I have assembled them like you did but don't do them that way anymore. I assmeble the arm and PB then grease and install the outer brg and seal.
Then press the brg on the spindle on the press. Makes it a lot easier. This is done after the brg's have already been fit on the setup tool.
 
#23 · (Edited)
Good write up on building the bearing assemblies but I feel you let a lot of info out. I just scrolled through it but I didn't see the following info.

What the actual bearing surface diameter on the spindle is supposed to be. If someone has undersized or oversized bearing surfaces, wouldn't that account for something?

You didn't state how to check it a t-arm, caliper mounting bracket or bearing support for straightness. Since you rebuild these for people you should know well enough that many t-arms are bent and also caliper mounting brackets. You just said look the t-arm over for rot or bent. What are the specs of the t-arms and caliper mounting brackets and how can the DIY guy fix it?

If someone goes through all that work to build the bearings but leave out the rest, thats like building 1/2 the puzzle. Bent t-arms will lead to bad alignments. Bent caliper mounting brackets increases the likelyhood of low brake pedal. It can also cock a piston in the caliper.

Don't you feel all of this should be mentioned as part of the rebuild? Your kind of harsh on other rebuilders. Many have been doing this for a long time. Maching parts for the rebuild is nothing new. Just feels like you invented the maching aspect of it all and taking the credit. Take a look at most of the corvette warehouses and rebuilders. Many have been doing this type of stuff since the 70's. I'm mean no disrepect to you but this write up is only 1/2 of the project.
 
#24 ·
Harsh on rebuilders? That's interesting. If holding others up to the job is being harsh, too bad. I supplied this post, as well as others, to give people the awareness of how the job should be done. No I didn't invent any of this nor did I ever say I did. I've been in corvette shops and have yet to see any machine tools in them. One shop even told me they use special bearings, which were the German equvilant to Timken's. I choose to use USA bearings.
Also I've never seen one rebuilder say they use a surface grinder. Will not using one affect the overall quality of the job? I think so but that's my opinion.

What I have done was to rework some of the jobs being offered by some of the other rebuilders out there. Have I ever posted on a vendor in particular? No. Are all the same - no. I will put my work up against anyones out there.

I have never seen one other rebuilder out there post full procedures for any of this work- why is that?

You have questioned my posts in the past as well, yet I don't know who you are. Are you involved in the business, work for a vendor?

You are certainly welcome to question my work but as I have said in the past the things I post are the procedures that have worked for me. Does it mean everyone should follow them, no not at all. They are an option for guys who want to know more about something. Do other rebuilders care if I post this info, I really don't know or care if they do. There is no secret to this work but there is a lot of bad work out there.

So, since you are experienced and seem to question my work I'll ask you to step up and answer those questions you posted about. Add in some pictures as well as I'm sure I'm not the only one interested.

If you had personal question to ask you could have PM'd me as many do, but you chose to post in public so I do have to question your motives.

So lets see your work. I'll be more then happy to see others post procedures on this subject or others I've worked on.
 
#25 ·
I would say no vendor post pics of the rebuilding process b/c they obviously want the customer to send their parts in. Seems like a no brainer to me. Maybe the shop with the German bearings didn't want to give you info. People snoop around a lot and try to find things out and go off and do them on their own. Why do race teams keep their secrets to themselves. So no one else will do what they do. Every rebuilding does it their own way and some may have a trick or 2 that you don't know about. Thats why they don't post pics.

I don't know what shops or rebuilders you have been to that do rebuild bearings, nor do I care. And no, you never mentioned any names. I bet if you did and they were a member of this or that forum they would reply. As you can see on the side bar, there are no vendors that rebuild these on this site.

I have been to a corvette rebuilders shop and have seen surface grinders. But if a shop uses new shims, what would they need a surface grinder for? They are already premeasured. Than your reply is, what if it's not the right size shims in the kit. My reply is, get a block of wood and some sand paper and take a thou or 2 off. Simple as that. Or take it to a mchine shop and have them take off whatever you need.

I would also catagorize a shop and a rebuilder as 2 different people. A shop could be any ole garage while a rebuilder does this for a living. So which have you been to?

No need to take it to PM b/c everyone should know that there is more to trailing arms than your write up. Wouldn't you agree?

No problem on answering my questions to you.

For trailing arms all you have to do is get a straight end and ruler. Place your straight edge from where the bearing support goes into the to t-arm, out to the bushing. Take your ruler and measure the distance from the arm to the straight edge. You will measure just in front of the bushing. When you find your distance you will know if your arm is bent or not. Can you fill in the blank on how many inches? A qualified rebuilder would have a jig. Thats just a home remidy.

To check a caliper mounting bracket you need a jig. I see no other way around it. Measuring it with a mic or ruler won't work. When I built mine, I made it off of a new caliper mounting bracket. I see no jig in any of your posts. So how do you check them or are you checking them?

I don't do this on a regular basis so I have nothing to take pics of and post. I have done quite a few in the past though, I have personally owned 36 and just sold my 80. I farmed some out and rebuilt my own. When I worked on others cars I farmed them out for warranty purposes.

If your rebuilding all of these for people and making a profit than why aren't you a vendor here or at the other place? Hell you would be the only C2 C3 vendor here. Why are you getting offsensive when your work is questioned? Your that good and thorough you shouldn't have any problem asnwering these questions on the spot. You should be giving the people the full scoop. Not putting a tire on a rim with no air and telling them to drive safe.
 
#27 ·
Gary, for whatever it's worth please don't let this antagonism stop you from posting your proceedures here!! I used your threads to set up my trailing arms and rotors too! The directions are straightforward and allowed me to not only save money but also have the satisfaction of doing yet another process myself. My car tracks perfectly and I have great brake pedal with the near perfect runout I achieved using your posts. :thumbsup: Thank you and again---PLEASE DON'T STOP. :cheers: Art
 
#29 ·
:WTF
Some people just don't play well with others.

I'm sure I'm not alone in saying that Gary's posts are more than just informative; they give many of us the incentive to learn more about our cars by tackling more complex jobs. I'm a hobbyist and a somewhat experienced mechanic.......but Corvetts are new to me. I certainly appreciate someone who is generous enough to share his knowledge.....especially at the level of detail these posts get into........about Corvette specific components and assemblies.

All new information contributes to the overall knowledge base here. The negative posts and any "information" in them are quickly forgotton.

Thanks Gary.
 
This is an older thread, you may not receive a response, and could be reviving an old thread. Please consider creating a new thread.
Top