Corvette Forum : DigitalCorvettes.com Corvette Forums banner

Transmission crossmember accident repair help?

5.6K views 31 replies 15 participants last post by  Patro46  
#1 ·
Well...
On my way home from a short drive yesterday I had a bit of a problem.
While entering a gas station to fill up I encountered this


Vette damage by sylvestermark28, on Flickr


Vette damage by sylvestermark28, on Flickr


which led to this...
Vette damage by sylvestermark28, on Flickr


Vette damage by sylvestermark28, on Flickr


I spent a lot of time on this car this summer making sure everything was just right so that I could take it down with me to FL this winter. We are suppose to leave on the 18th.
I filed a claim with my insurance but because of my time constraints and the fact that I feel I can repair this damage myself, I am asking for some guidance from the members here.
If you were faced with this problem, how would you go about making the necessary repairs?
I am not really concerned with the fiberglass damage to the floor at this time...what I need suggestions on is how would you go about replacing the crossmember?
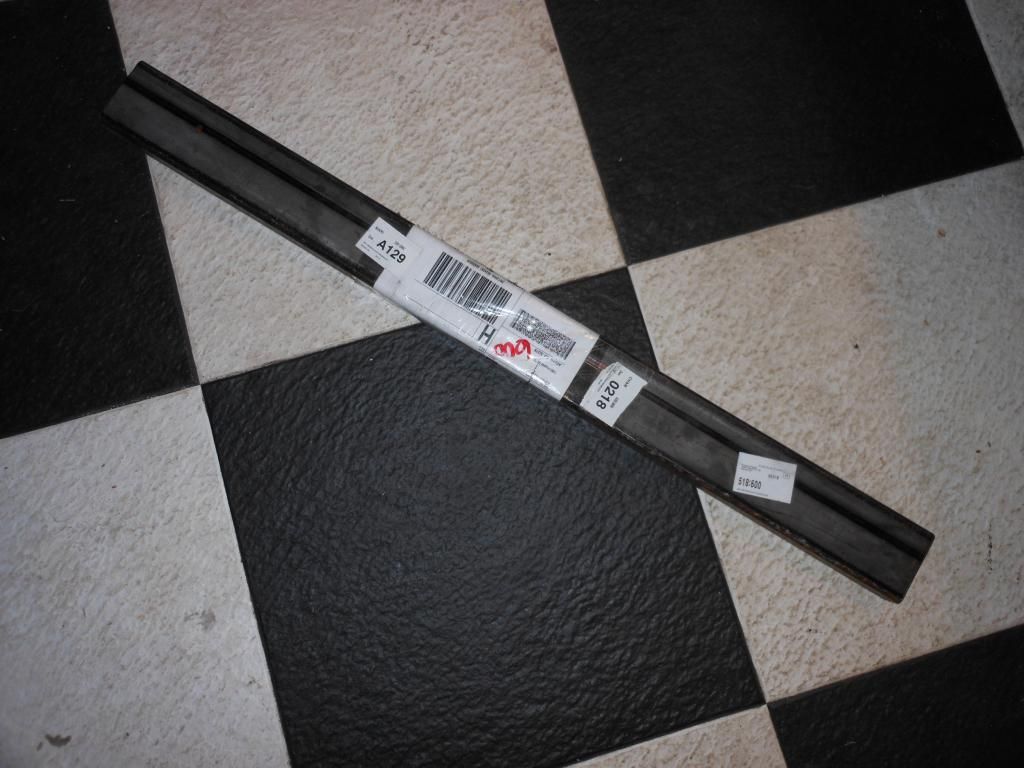
Is there a company that sells replacement removable crossmembers?
As you may notice I had made my old crossmember removable during the restoration in '07.
The other issue is that I also have a ford T-5 trans but I think I can modify a replacement stock crossmember to suit my needs.
I don't feel I have the engineering knowledge to fabricate a crossmember from scratch.
I do have access to a welder.
although this is just a machine comprised of nuts and bolts I am surprised by how this has affected me. It's been a pretty bad year all in all and this is the last thing I needed at this time...
Oh well...
That's it and any help rendered would be greatly appreciated.
 
#4 ·
Thanks Metalkid!!!
However after catching my breath and letting my blood pressure come down a LOT I have determined I can do this!
The above recommendation is the best, stock way to go but it would require me to be able to access the top of the crossmember to weld it and I really don't have the time or ambition to lift the body.
Sooo...what I hope to do is fab my own.
What I'm not sure of is just how strong this part has to be.
I have a few ideas rattling around in my head that involve some angle iron and square stock but I am not sure how stout it has to be.
For example what thickness should I use. I'm thinking about welding some angle stock on the bottom of the frame set back from the inner wall to allow access to the bolts that will hold the square tube in place. All this really does is hold the weight of the trans and resist a bit of torque from the trans, correct??
1/4" is probably too much...3/16ths sound about right?
Along with some more angle up the side of the square stock to meet the trans mount and I should be there....Right???
I can address the parking brake mount at another time. After all, I use it very little here in MI. and I doubt I will need it more frequently in FL.
Thoughts???


Another and maybe more practical option would be to pick up a removable cross member from an auto trans car but I would need a way to access the nuts that hold it in place.
From the factory I'm assuming the nuts are welded in place inside the frame, correct???
would it weaken the frame too much if I were to cut a slot in the side to be able to get a wrench on the nuts? Or is there another solution? I've heard of Nutserts but I don't have the cash to invest in a pricy tool for a one time use. And I don't know if that would be strong enough.
What say you???
 
#7 ·
I'd get a crossmember like josh uses for ls conversions, cut the old junk off and clean the frame up, weld studs on the frame and bolt on the crossmember. Josh told me they rarely use the side bolts just the four bottom ones. Same could be done with a factory style bolt on but the aftermarket seem a lot less bulky. Don't use nutserts, time wasted...imho
 
#5 ·
First off Sly, it must be said this left a hole in my stomach, and I feel absolutely sick about this tragedy. You've no idea hoiw envious I've been of your car. I truly feel for you bro.:(

This said, we can't cry over spilled milk, as from reading on in this blog you've already sucked it up, have a solution, and have already begun plans to repair. I wish you were closer to me. I'd sure lend you a hand getting your little lady back on the road again. (You have until March of 2015 to join me on the '15 Power Tour):partyon:
If you can't find a factory crossmember, left me know and I try to pull a favor. Let me know.:cheers:
Once again Sly, this **** makes me sick, and I'm so sorry this crap happened to your lady and not some deserving rice burner. :down:
 
#6 ·
All I can say is Damn!!!! What a sickening feeling.....


You're running sidepipes...so this would be a solution.

I used 3" x 1-1/2" x 3/16"- it actually fits inside the factory x member.... bought it on eBay for like $30.

Could just cut back the x member- slide in and run some bolts through it.


DSCN4446 by richardhayes454, on Flickr
 
#8 ·
Sly that's a horrible thing to happen to a great guy and an awesome car. I trust you'll get it fixed. I wish we lived closer to one another...heck a few of us even, and we could all gather together and knock it out over a few beers and some BBQ.

If I were in your shoes, I would check with Bowtie Overdrives for a tube cross member that's designed for your transmission. Maybe they sell one. You could mock it up, mark the location, drill and tap some bolt holes, and bolt it up in place.
 
#9 · (Edited)
Thank you all for the support!
I like the many suggestions given and have decided to go with a factory auto trans cross member. They are plentiful in this area and can be modded easily enough with the small bit of fabricated parts I used to get the ford T-5 to fit on the old cross member... those that weren't mangled that is!!!
I would go with Richards idea but for the fact that the driver side was ripped completely from the frame and there is nothing to mount the new stock to.
The aftermarket piece is a viable option but for the fact that they are more expensive than a stock piece and from what I can tell they are designed for a G.M T-5 incorporating a slight tilt, I believe....I e-mailed Bowtie with no response.

And I certainly agree with DB in as much that it sure would be great if we were all a bit closer together. Sure would make for some interesting "Wrench Sessions"!! with a few brews just for good measure, of course!!One thing I am sure of is that I will get this done in short order...I absolutely have to have my car down in FL with me.
Now that we own a home down there and plan on staying for at least 6-7 months I couldn't bear to be away from it for that long. Perhaps I may even go on a few overnighters to visit a few of you fine folks. Kinda like my own little mini "Power Tour" once a month!!!
And it would give me an excuse to get away from my better half! They say "Absence makes the heart grow fonder" right??? Hahaha!!!
Thanks again guys! I'll keep you up to date on my progress.
 
#10 ·
Sly,

I can't really describe my reaction to seeing the photos.... What I can tell you is that I feel for you. Damn that is ugly.... Although you're probably lucky the welds broke loose, without that you would likely be hunting a frame.

I would have been totally cheezed off at the oil company. Can't be the first time this has happened, just lazyness on their part not having it fixed. You might have to slip a whole Exlax candy bar into their lunch somehow. Fuggers.

As a manager of subordinates I regularly measure grit, tenacity and resourcefulness by how individuals bounce back from obversity. You certainly turned this around quickly, already have a plan, decided on replacement parts and are moving forward.

Sorry to see it but Great Job!!! on your recovery. How is the transmission tail housing?
 
#11 ·
Yeah..I did get lucky in as much as it appears that there was no further damage to any other component other than the crossmember itself. The trans is shifted to the right a bit but after some measuring I can see that the motor mounts just got stretched a bit. From what I can tell it looks like a new crossmember and some glass work to the floor and I'm back on the road! Very lucky indeed!!!
I am currently waiting for an insurance appraiser to come on Thursday to look at the car and then I will be able to remove the damaged pieces and get a better assessment of the situation. They stated that it will be my decision as to what repair facility I wish to take it to and if I choose to do the repair myself they will cut me a check for the amount they would pay a repair shop to do the work. We will see just how this works out. I finally got in touch with Bowtie and they have a crosmember that will work with perhaps some minor modification. And its less money than a stock piece.
At that point I can refine my plan and get this thing back on the road.
Its starting to get cold here in MI and these old bones don't like it much. I gotta get my car repaired and on a trailer to get down to the Sunshine State.
Thanks again for all your support...
 
#13 ·
Damn sly you took it better than I would have, I would be in jail after I told the store owner what I thought about his sorry ass. I don't think you will have any problem fixing it and I like the route you have chosen. The cross member could be welded in place from the bottom and then later on grind the welds loose and bolted when there's more time.


:cheers:
Mark
 
#14 ·
Ok...I'm ready to start on the replacement of the crossmember and have a small problem...
I don't have access to be able to weld the top of the crossmember without raising the body.
Do you think it will be strong enough with welding just the sides and the bottom?
Keep in mind that this car is not pushed very hard. I may have the time to raise the body next summer to weld the top but time right now time is not on my side.
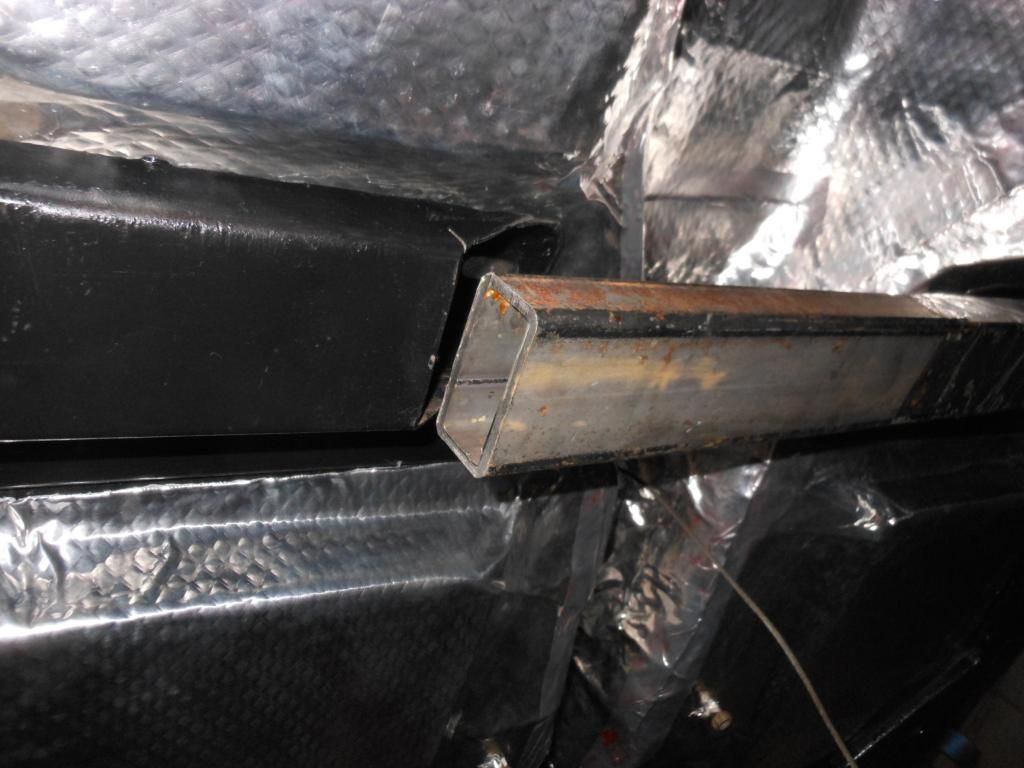
I've also included some pics of the damage after partial disassembly... I got lucky! It could have been a lot worse.


Cross member by sylvestermark28, on Flickr
Vette damage by sylvestermark28, on Flickr


Vette damage by sylvestermark28, on Flickr


This is what I'm dealing with as far as access to the top weld...Vette damage by sylvestermark28, on Flickr
 
#16 ·
Nor would I pull the body just to make that weld. The bolt on xmembers only bolt on the bottom and one bolt through the side. Josh doesn't even use the side bolts sometimes (they don't line up with the aftermarket members).

If you do pull the body in the future, we can probably count on you being here for a few years! :lookinup: :cheers:
 
#19 ·
Well...I got the crossmember in place


Crossmember in place by sylvestermark28, on Flickr


But as I was working on it a strange thing happened.
Every time I would climb out from under the car I would get very lightheaded. So much so that I thought I would pass out.
So I took a break for a couple of days and now all is good.
Never fails when you're working on a schedule though, does it???
Just to be on the safe side I am seeing my Dr. on Wed to make sure all is well.
Any way...as I was preparing to hone my welding skills, I dropped the welding helmet that I had borrowed and broke the lens!!(Dumb Pollack)!!! At least it was an old helmet, not the more up to date auto darkening type so a new lens is only a few bucks.
With the stores closed last night I figured I would get the fiberglass work out of the way and, for a change, that went off without a hitch. As a matter of fact, the damage was far enough back on the floor pan that I was able to repair it without having to remove the entire carpet.


Vette damage by sylvestermark28, on Flickr


I simply pulled it out of the way after removing the sill plate and some of the trim, and that part of the job is done except for some paint.
Back to the welding tomorrow... With a different welding helmet. Something better(auto darkening)...that a neighbor has, along with his mig welder. The other welder that I borrowed was a arc welder from the 50's from the looks of it, and although all I have ever welded with in the past is an arc welder, I'm looking forward to learning on this NEW technology! Hahaha...
Thanks for confirming for me that the welding tabs that are accessible to me without lifting the body will be sufficient. I thought that it would be strong enough without being able to get to the top of the frame but hearing it from others will allow me to sleep better at night.
Tomorrow I get to the welding and hopefully I will have this wrapped up by the middle of the week, barring any other surprises, that is...
Another thing I would like to mention is that the insurance company has been great. The appraiser was here last week and Haggerty will be cutting me a check for the cost of the parts and 20 hours labor after the repairs are complete and I am able to take it for a ride and make sure there is no other damage I am not aware of.
I know that it would cost them a lot more if I were to take the car to a Corvette repair facility but I am happy with this deal cause with me doing the work it will be done much sooner, done correctly and I will be able to take the car with me down to FL as I had hoped. Everybody's happy!!!
I bought the crossmember from VBP which is only about an hour from my home. Again...Very nice people to do business with. Like I stated before I really feel like I got pretty lucky with this considering how bad it could have been if for example I would have smashed the bellhousing or took off the tailhousing and driveshaft.
Thanks again for your support and I will keep you aware of my progress.
 
#21 ·
So all the repairs are done except for the paint and replacing the fuel line and putting the brake line back in place. I didn't have to remove the brake line as I did with the fuel line, I simply removed the brackets that held it in place and pulled it off to the side.
This was my first time welding in 40 years and the first time with that NEW Mig technology...(Hahaha)!!!


Vett repairs by sylvestermark28, on Flickr


Might not be as pretty as some but I got good penetration and it will be secure. It is at least as good as some of the factory welds I have seen. I must say I really like the mig welder I borrowed. I may have to buy one as a new toy!
The floor pan damage is done also. I finished with a skim coat of bondo and will sand and paint that tomorrow as well.


Trans crossmember repair by sylvestermark28, on Flickr


In this pic you can see the slight mod done to a stock crossmember to get it to work with the T-5 trans...
Trans crossmember repair by sylvestermark28, on Flickr


Simply turn the bracket upside down and it fits great.


and yes...that is a small burn on the pass side floor pan. I about crapped myself when I lifted my welding helmet and seen a small flame! But a few spritzes with a water bottle put it out. Glad I didn't have to resort to the dry chemical extinguisher. That would have made more of a mess than I currently have with the dust from the fiberglass and filler dust. That stuff is everywhere!!!
Wednesday I am also expecting delivery of some new side exhaust mufflers. Something a bit quieter for the old folks in the retirement community I live in when in FL. And the wife will be happy too. And as all of us that are married know..."A Happy Wife means a Happy Life"
I also noticed that when I tried to attach the parking brake cable the handle will not go all the way down. I will be looking at that tomorrow also and will add it to the insurance estimate if it needs to be replaced.
That's all for now...
Thanks for your support!
 
#23 ·
I am really amazed at the speed in which you've been moving. True passion has no limits my friend! Your welds look like you got some good penetration, and you really lucked out on the fiberglass work. I'd almost bet you might be back on the road by the weekend. Keep up the great work!:partyon:
 
#25 ·
The welder is a Lincoln 120V Gary and it worked very well. I could have easily welded 1/4" stock with this unit although I would have had to lay down multiple beads. More than enough for the hobbyist.


And It's DONE!!!


Except for a silly mistake on my part...
After the accident when it was on the flatbed the driver asked if I would set the parking brake. No problem...so I get in and pull back on the handle only to find that the cable had too much slack due to the crossmember being a bit askew.
No problem...I put it in gear and got it home.
Well, when I get it in the garage I try to put the handle down and it would not go into its seated position.
Being the genius that I am, I proceed to remove the rear compartment doors and frame and glove box insert to be able to access the bolt that hold on the cover that goes over the parking brake mechanism ONLY THEN to remember that the lever will not go all the way down unless there is tension on the cable from the spring under the car. So I get under the car and hook up the cable and ...PRESTO...It works as it should!
Tomorrow I will reinstall the cover for the parking brake install the driver seat reinstall the trim and sill plate along with a bit of vacuum cleaner action and a wash and it's back on the road!!!
There is a check in the mail from Haggerty for $1,308.00 and the parts set me back just over $400.00. I put about $900.00 in my pocket for my trouble and all is good.
Yeah....if I would have taken it to a Vette shop it would have cost the insurance co. a lot more and taken a lot more time but as I stated earlier, now I get to trailer it down to FL. with me next week and I'm sure the work is done right the first time.
This adventure is over and all in all I'm a happy guy!!!
Thanks for following along and offering support! For those that have been unfortunate enough to have their car damaged due to an accident, you know how traumatic it can be. With the advise and support of this group, what started as a very stressful event turned out to be a learning experience and I thank you all!!!
Sly


p.s....I also got the new mufflers in the sidepipes and it is quiet enough to where I should not get thrown out of the retirement community that I live in, in FL. At least not for excessive noise anyway!!! Hahaha!!!
 
#26 ·
The welder is a Lincoln 120V Gary and it worked very well. I could have easily welded 1/4" stock with this unit although I would have had to lay down multiple beads. More than enough for the hobbyist.
GMAW (gas metal arc welding) aka MIG welding has been around for about 65 years so the process is not new.

Image


The bottle of shielding gas must be out of the picture. And the gas nozzle is missing from the gun. Without both, that PowerMig 140 is only capable of flux-core welding.